| Version 65 (modified by , 13 years ago) (diff) |
|---|
"You are now rockin with the west" - Mike Ryan
An Exercise in Anonymity
Step 1 Setting Up the Network
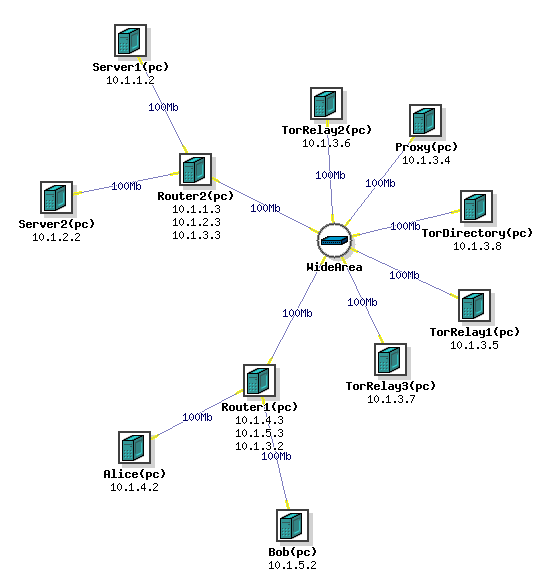
Swap in the Experiment using this NS file
Then log in to users.isi.deterlab.net through Putty. For help on logging onto Putty check out this tutorial.
Setting up apache
We need to generate traffic in our network and one of the easiest ways to do that is with HTTP traffic, so we need to set up a server and a web page. Connect to Server 1 and run this script with the sudo command This will run a script with Apache 2 which sets up the server and web page and displays the users IP address on the Server 1 node. When prompted "Do you want to continue [Y/n]?" select Y Once the script is done running, the server is now set up and we can generate traffic! You can check this by typing w3m http://localhost/cgi-bin/ip.cgi which should display your IP address.
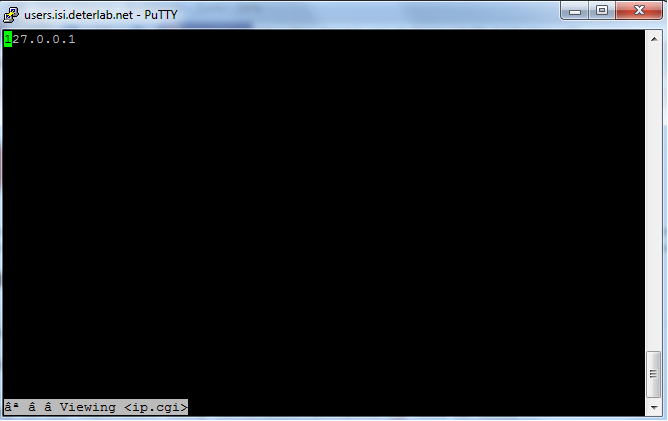
It should look like this. Repeat this process on Server 2
Setting up the proxy node
Log onto the proxy node and use the command this script with the sudo command this will run a script which installs and sets up tinyproxy on the node. The proxy is now set up! We'll get to using it in a little while.
Step 2 Generating and Listening to Network Traffic
We are now ready to begin learning! One person needs to connect to either Alice while another person logs into the server1 node (or server2 if you choose). From the server node type the command ifconfig This will show the ethernet links that the node is using.
Find the one that shows an inet address of 10.x.x.x In the example above it is eth0. Yours may be different, but that is still ok.
Direct Client-to-Server Traffic
Then type the command sudo tcpdump -i eth0 -s 0 -x -w /tmp/direct.pcap and thencp /tmp/direct.pcap . This will begin listening to the traffic that comes through this node and that specific ethernet link, eth0 in the example, write the data out to the file direct.pcap in the tmp diretory, and then copy it into the users directory. At this time, the person connected to Alice will enter the command wget --no-proxy http://server1/cgi-bin/ip.cgi This saves a local copy of the web page set up on the server, and by doing so generates HTTP traffic to examine. We were able to listen in on this traffic thanks to the tcpdump command. We'll analyze what this data looks like and can tell us at a later time.
Client-to-Server Traffic through a Proxy
Now we'll use a proxy to make this traffic a bit more anonymous. A proxy will mask the source and destination of the traffic from both the client and the server by working as a go between for the two nodes. Repeat the tcpdump command sudo tcpdump -i eth0 -s 0 -x -w /tmp/throughproxy.pcap and then cp /tmp/throughproxy.pcap . from the server node. However, now the user connected to Alice should enter the command env http_proxy=http://proxy:8888 wget http://server1/cgi-bin/ip.cgi This command changes an environmental setting and sends the wget command through the proxy on port 8888. Thanks to the tcpdump command, we have a copy of this traffic as well.
Client-to-Server Traffic through Tor
We will now use Tor to
onion route the data. As the name suggests onion routing alters the data flow through a minimum of 3 relays, each adding another layer of anonymity, because the packets of data only know the address of the next relay and the previous relay. Repeat the tcpdump command sudo tcpdump -i eth0 -s 0 -x -w /tmp/throughtor.pcap and cp /tmp/throughtor.pcap . from the server node. Now, the user on Alice should use the command torify wget http://server/cgi-bin/ip.cgi
Step 3 Analyzing the Traffic Data
So now we have collected HTTP network traffic data from 3 different connections: direct, through a proxy, and through the Tor network. Now, it's time to analyze that data. We will do this using Wireshark. To access this data we need to use the SSH Secure File Transfer Client
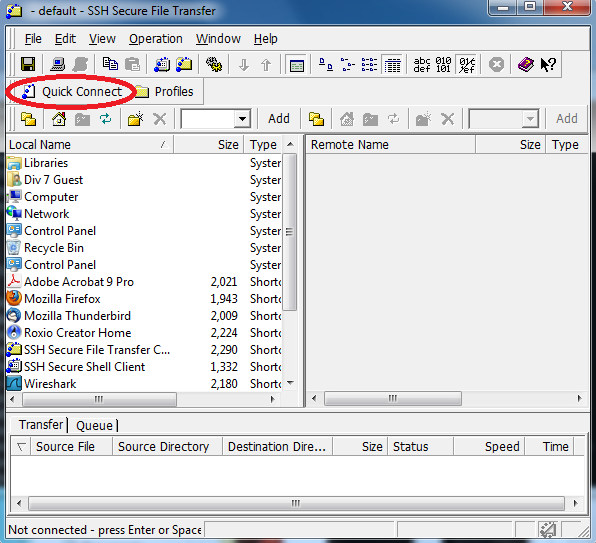
Click on the Quick Connect Button
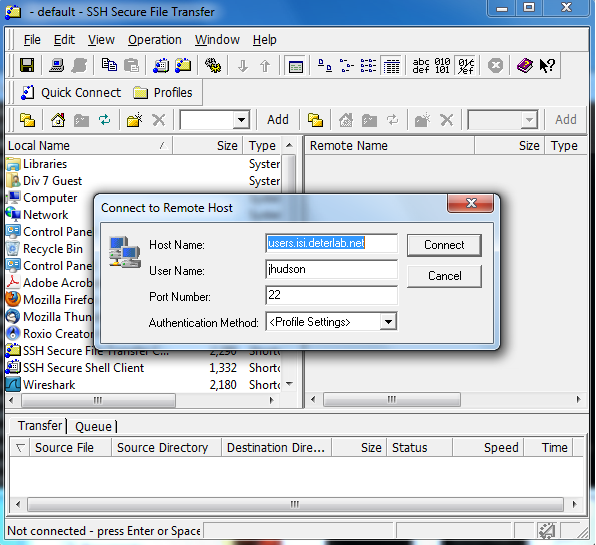
It should look like this. Click Connect, and enter your password when prompted. In the right column, you should see three files: direct.pcap, throughproxy.pcap, and throughtor.pcap. Copy these files and place them on your desktop. Then open up Wireshark.
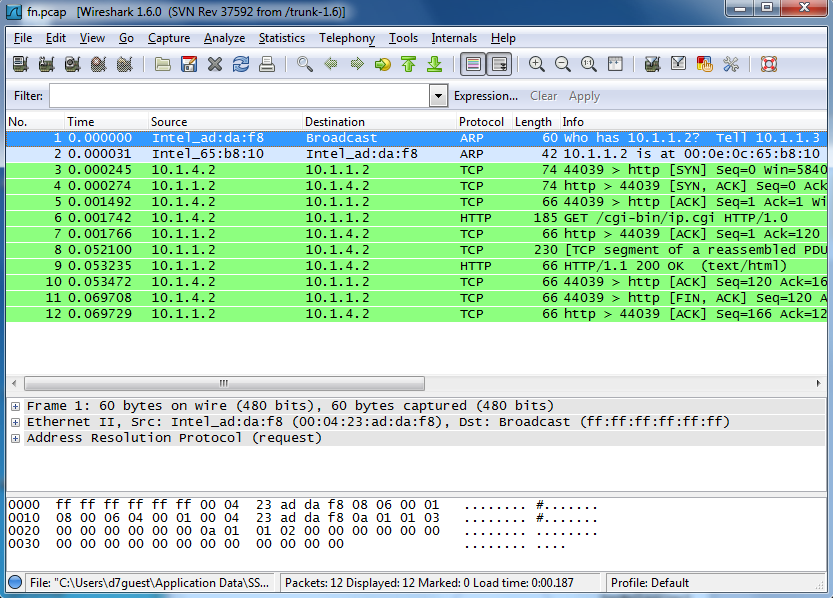
Click on the File tab, and click Open. Find the 3 data files on your desktop and open up direct.pcap.
It should look similar to this. Let's check out the source and destination information from the HTTP data packets. We can see that the source is 10.1.4.2, which corresponds to the Alice node IP address, and the destination is 10.1.1.2, which corresponds to the Server1 node's IP address. This makes it clear that Alice was making an HTTP request to Server1. Now open up throughproxy.pcap in Wireshark. What we see is much different, we see that the destination is
Attachments (24)
- Walk Through.docx (353.0 KB) - added by 13 years ago.
- wan.php3 (692 bytes) - added by 13 years ago.
- apache2setup.png (34.3 KB) - added by 13 years ago.
- sshclientlogon.png (91.0 KB) - added by 13 years ago.
- sshclientstart.png (62.1 KB) - added by 13 years ago.
- wireshark.png (111.7 KB) - added by 13 years ago.
- networksetup.png (18.9 KB) - added by 13 years ago.
- wiresharkdirect.png (93.7 KB) - added by 13 years ago.
- wiresharkthroughproxy.png (104.2 KB) - added by 13 years ago.
- wiresharkthroughtor.png (112.9 KB) - added by 13 years ago.
- ifconfig.2.png (58.3 KB) - added by 13 years ago.
- ifconfig.png (68.7 KB) - added by 13 years ago.
- ifconfig.3.png (68.7 KB) - added by 13 years ago.
- readwireshark.png (131.1 KB) - added by 13 years ago.
- Regular Dataflow.png (39.3 KB) - added by 13 years ago.
- Proxy Dataflow.png (42.7 KB) - added by 13 years ago.
- Tor Dataflow.png (43.0 KB) - added by 13 years ago.
- onion.png (23.9 KB) - added by 13 years ago.
- anonymous.2.ns (2.6 KB) - added by 13 years ago.
- anonymous.txt (2.6 KB) - added by 13 years ago.
- anonymous.ns (2.6 KB) - added by 13 years ago.
- tor_setup.tgz (5.6 KB) - added by 13 years ago.
- runme.apache (370 bytes) - added by 13 years ago.
- runme.proxy (280 bytes) - added by 13 years ago.
Download all attachments as: .zip

