 This image was obtained from http://en.wikipedia.org/wiki/File:Onion diagram.svg
This has been created as a classroom exercise explaining and demonstrating a few different techniques in active anonymity, and intercepting and making sense of web traffic. Throughout this exercise you will:
Anonymity is important because it allows a user to communicate with a service or another user without fear of someone eavesdropping or figuring out their location. When two systems communicate directly, it makes it easy for someone to figure out who is talking to who and what they are saying. Keeping your identity hidden is important because it can keep large companies and organizations from collecting your information. Anonymity tools can help them communicate more securely. There are many tools and practices that can be used to help maintain anonymity, and this lesson covers two.
One method of hiding your identity would be using a proxy server which works by acting as a mediator between you and the service you are communicating with. Proxies are used to hide web traffic from the service the user is attempting to connect to. All the data you send and all the data you receive goes through it. By connection through a proxy the user is able to camouflage his actual identity so that the service only sees the address of the proxy. The benefits of using a proxy are
But there are a few drawbacks to this
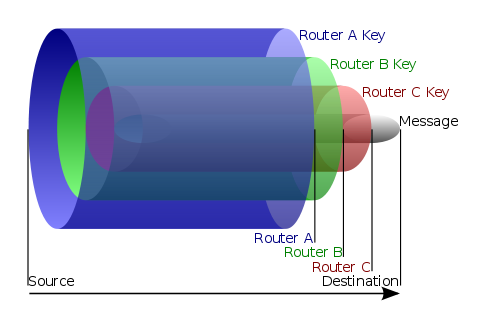
Another method of cloaking one's identity is through using a program called Tor. Tor takes the proxy idea and expands it using the idea of onion routing. Onion routing is an anonymity tool which uses multiple routers to hide web traffic from the sender to the server. The web data is encrypted using layers, with each layer being removed at the subsequent routers. This means that each router can only see two parts of the traffic, the preceding node and the next node. Therefore a compromised node would not lead to the identity of either person being revealed.
 This image was obtained from http://en.wikipedia.org/wiki/File:Onion diagram.svg
For this exercise, we are going to set up a network with 11 different nodes. 2 nodes will be client nodes, Alice and Bob, which will be making HTTP requests from 2 other nodes, Server1 and Server2, which will be running Apache2. There will be a proxy node running tinyproxy, 4 nodes running the Tor program, and 2 routers. Once we set up the network, we will set up tinyproxy on the proxy node and Apache2 on the 2 Server nodes. Then we will have Alice make HTTP requests of the Server1 node directly, through the proxy, and through the Tor network, while we sniff the requests. The "Wide Area" should be treated as a cloud of an unknown number of computers and routers, representing a large network where we are just highlighting the nodes used for Tor. We will then analyze this data using Wireshark to determine who is communicating and what they are saying.
Swap in the Experiment using this NS file
Then log in to users.isi.deterlab.net through Putty. For help on logging onto Putty check out this tutorial.
We need to generate traffic in our network and one of the easiest ways to do that is with HTTP traffic, so we need to set up a server and a web page. Connect to Server 1 and run this script with the sudo command
#! /bin/sh

apt-get install apache2

echo "ServerName localhost" | sudo tee /etc/apache2/conf.d/fqdn

echo "#!/usr/bin/env python\nimport cgi\nimport os\n\nprint \"Content-type: text/html\" \nprint \"\" \n\nprint cgi.escape(os.environ[\"REMOTE_ADDR\"])" > /usr/lib/cgi-bin/ip.txt

mv /usr/lib/cgi-bin/ip.txt /usr/lib/cgi-bin/ip.cgi

chmod 755 /usr/lib/cgi-bin/ip.cgi
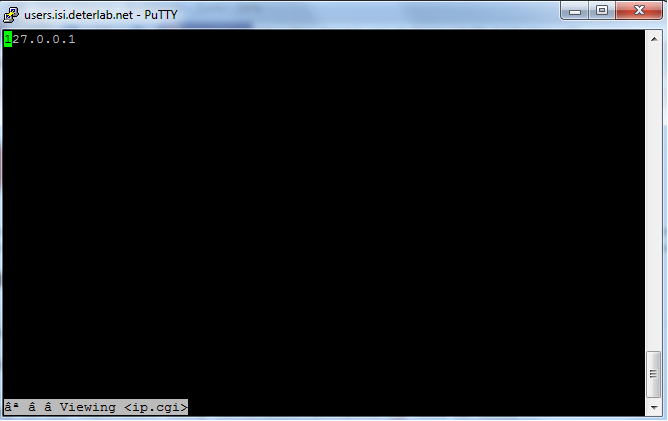
This will run a script with Apache 2 which sets up the server and web page and displays the users IP address on the Server 1 node. When prompted "Do you want to continue [Y/n]?" select Y Once the script is done running, the server is now set up and we can generate traffic! You can check this by typing w3m http://localhost/cgi-bin/ip.cgi which should display your IP address.

It should look like this. Repeat this process on Server 2
Log onto the proxy node and use this script with the sudo command
#! /bin/sh

apt-get update

apt-get install tinyproxy

apt-get update

echo "Filter \"/etc/tinyproxy/filter\"\nFilterURLs On\nAllow 10.0.0.0/8" >> /etc/tinyproxy.conf

cp /usr/share/tinyproxy/default.html /usr/share/tinyproxy/default.html.ORIGINAL

/etc/init.d/tinyproxy reset
This will run a script which installs and sets up tinyproxy on the node. Tinyproxy is a free program and is designed to be small and easy to operate. The proxy is now set up! We'll get to using it in a little while.
We are now ready to begin learning!
The topics to be covered are
One person needs to connect to either Alice while another person logs into the server1 node (or server2 if you choose). From the server node type the command ifconfig This will show the ethernet links that the node is using.
Find the one that shows an inet address of 10.x.x.x In the example above it is eth0. Yours may be different, but that is still ok.
Then type the command sudo tcpdump -i eth0 -s 0 -x -w /tmp/direct.pcap. This will begin listening to the traffic that comes through this node and that specific ethernet link, eth0 in the example, write the data out to the file direct.pcap in the tmp diretory. For more help with tcpdump type in the command man tcpdump At this time, the person connected to Alice will enter the command wget --no-proxy http://server1/cgi-bin/ip.cgi This saves a local copy of the web page set up on the server, and by doing so generates HTTP traffic to examine. We were able to listen in on this traffic thanks to the tcpdump command. Then the users connected to Server1 will enter the command cp /tmp/direct.pcap . This will copy the file with the sniffed data into the users directory. We'll analyze what this data looks like and can tell us at a later time. However if you want to analyze this data now before we sniff more, proceed to Step 3 on this page.
To reiterate, the commands are:
sudo tcpdump -i eth0 -s 0 -x -w /tmp/direct.pcap. from the server
wget --no-proxy http://server1/cgi-bin/ip.cgi from Alice
cp /tmp/direct.pcap . from the server after closing the tcpdump
Now we'll use a proxy to make this traffic a bit more anonymous. A proxy will mask the source and destination of the traffic from both the client and the server by working as a go between for the two nodes. Repeat the tcpdump command sudo tcpdump -i eth0 -s 0 -x -w /tmp/throughproxy.pcap. However, now the user connected to Alice should enter the command env http_proxy=http://proxy:8888 wget http://server1/cgi-bin/ip.cgi This command changes an environmental setting and sends the wget command through the proxy on port 8888. Thanks to the tcpdump command, we have a copy of this traffic as well. Then the user on the Server1 node should enter cp /tmp/throughproxy.pcap . This saves us a copy of the data.
Again, in order:
sudo tcpdump -i eth0 -s 0 -x -w /tmp/direct.pcap. from the server
env http_proxy=http://proxy:8888 wget http://server1/cgi-bin/ip.cgi from Alice
cp /tmp/direct.pcap . from the server after closing the tcpdump
We will now use Tor to
onion route the data. As the name suggests onion routing alters the data flow through a minimum of 3 relays, each adding another layer of anonymity, because the packets of data only know the address of the next relay and the previous relay. Repeat the tcpdump command sudo tcpdump -i eth0 -s 0 -x -w /tmp/throughtor.pcap . Now, the user on Alice should use the command torify wget http://server/cgi-bin/ip.cgi And then cp /tmp/throughtor.pcap . from the server node.
In order:
sudo tcpdump -i eth0 -s 0 -x -w /tmp/direct.pcap. from the server
torify wget http://server/cgi-bin/ip.cgi from Alice
cp /tmp/direct.pcap . from the server after closing the tcpdump
So now we have collected HTTP network traffic data from 3 different connections: direct, through a proxy, and through the Tor network. Now, it's time to analyze that data. We will do this using Wireshark. Wireshark is a network packet analyzer, it takes captured packets (or captures its own) and then analyzes and displays the data in the packets. Displaying the information allows the Wireshark user to ensure that no harmful communication is being used against the system or to even spy on a system. To access this data we need to use the SSH Secure File Transfer Client
Click on the Quick Connect Button
It should look like this. Click Connect, and enter your password when prompted. In the right column, you should see three files: direct.pcap, throughproxy.pcap, and throughtor.pcap. Copy these files and place them on your desktop. Then open up Wireshark.
Click on the File tab, and click Open. Find the 3 data files on your desktop and open up direct.pcap.
It should look similar to this. When you look at lines 1 and 2, you will see that this is the ARP request coming from Router2 looking for Server1. The ARP request is a request for the ethernet address of a node, using the IP address. After that, you will see that lines 3 and 4 are the the TCP requests from Alice to the Server1. After that in line 6 we see the HTTP request, this is requesting the actual page from the Apache2 server. Let's check out the source and destination information from the HTTP data packets. We can see that the in the source column and down to line 6 that the source of the HTTP request is 10.1.4.2, which corresponds to the Alice node IP address, and the destination in the destination column is 10.1.1.2, which corresponds to the Server1 node's IP address. This makes it clear that Alice was making an HTTP request to Server1.
Now open up throughproxy.pcap in Wireshark.
What we see is much different, we see that the source is 10.1.3.4, which is the IP address of the proxy node. So, now the destination, Server1, doesn't know that the request came from Alice, but instead thinks that the request came from the proxy node.
Now, we try it with the throughtor.pcap file.
Again we see that the source is not Alice, but instead matches the IP address from one of the Tor Relay nodes. It won't always be the same every time because the path that the data takes through the Tor network is random. This, like going through the proxy, provides anonymity for the client, in our case Alice, but this provides more anonymity because the data goes through 3 Tor relays instead of just one proxy.
This may provide for anonymous communication, but it doesn't keep the data secure. We might not know who the data came from, but we can still tell what it was. Open up one of the .pcap files.
Highlight one of the HTTP packets, then expand the Hypertext Transfer Protocol section. Here we can read that the command wget and the user was trying to access http://server1/cgi-bin/ip.cgi. So, even though the server doesn't know where the request came from, we still know what the command is.
If you want to explore this some more, you can use tcpdump and Wireshark on more than just the server node. When using the proxy to send data, you can use it on the Alice node and the proxy node to determine what each knows about the source and destination of the packets. If you're using Tor, then you can use it on the Alice node and the Tor Relays to determine what they all know about the packets. After you've done some of that, which anonymity tool do you think is the best at keeping users anonymous?